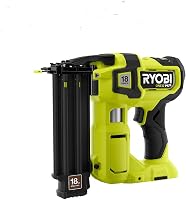
How Much Air Pressure for a Brad Nailer?
Set your brad nailer to 70 to 120 PSI, and start at the low end of that range. Most 18-gauge brad nailers list 70 to 120 PSI as their working pressure, so 80 to 90 PSI is a safe starting point for trim and small projects.
On this page (8 sections)
- What air pressure does an 18-gauge brad nailer need?
- How do you set and check the pressure?
- Why do low and high pressure both cause problems?
- What else affects the pressure at the nailer?
- How do you match pressure to trim and material?
- Can you run a brad nailer on a small compressor?
- How do you fix common pressure problems?
- What pressure should you use for the first test nail?
Set your brad nailer to 70 to 120 PSI, and start at the low end of that range. Most 18-gauge brad nailers list 70 to 120 PSI as their working pressure, so 80 to 90 PSI is a safe starting point for trim and small projects.
The number on the regulator only matters if it gives you the result you want: the nail should sink just below the surface without denting the wood. Get that result and the setting is doing its job.
What air pressure does an 18-gauge brad nailer need?
The working range for a typical 18-gauge brad nailer is 70 to 120 PSI. You don't need to run at the top of that window for everyday trim work.
The right setting inside the range depends on the material and the nail length. Soft pine and thin casing need less air than hardwood or long 2 in brads.
That's why most makers give a range instead of a single number.
Start at about 80 to 90 PSI on the regulator. Fire one test nail into a scrap piece of the same trim you're installing.
If the head sits flush or slightly below the surface, you're set.
Raise pressure in small steps only when heads stand proud. Drop it when the nail punches a visible crater.
The goal is a head that sits just under the surface, not buried.
How do you set and check the pressure?
Set the regulator with the hose and gun connected, then check the gauge before you start nailing. A reading taken without the tool attached runs high.
- Fill the compressor tank and let it cut off.
- Connect the hose and the brad nailer.
- Set the regulator to about 80 PSI with everything hooked up.
- Fire a test nail into a scrap of your trim.
- Adjust in 5 PSI steps until the head sets correctly.
Check the gauge again after a short run. A small compressor can lose pressure quickly when you fire several nails in a row.
If the needle drops, give the tank time to recover or use a larger tank.
If your regulator gauge sits at the compressor end of a long hose, the pressure at the gun will read lower. A gauge at the tool end tells you what the nailer really sees.
Why do low and high pressure both cause problems?
Low pressure leaves heads proud and can cause misfires, while high pressure overdrives nails and splits thin stock. Both problems show up fast in test pieces.
When the pressure is too low
Nails sit above the surface and catch on sandpaper or cloth. The gun may fail to fully cycle and leave a nail half-driven.
Raising the regulator fixes it, but don't jump straight to 120 PSI. Add air in small steps so you don't overshoot and dent the trim.
When the pressure is too high
Heads sink into soft wood and leave a crater that's hard to fill cleanly. Near the end of a board, high pressure can split the stock.
On thin casing or plywood, that happens with only a little too much air.
Overdriving also puts more wear on the driver blade and the bumper inside the tool. Turning the regulator down costs nothing and saves the nailer.
What else affects the pressure at the nailer?
Hose length, hose diameter and airflow all change what reaches the gun. The regulator number is only part of the story.
A long, narrow coil hose drops more pressure than a short, wide one. A small pancake tank also loses pressure during rapid fire.
If your nailer weakens after ten quick shots, the tank is the limit, not the regulator.
Water in the air line causes misfires and rust inside the tool. Fit a moisture filter or drain the tank before each session.
A few drops of nailer oil in the air inlet keep the seals working smoothly on oiled tools.
Air pressure also isn't the only depth control. Depth-of-drive wheels and nose tips adjust how far the head sits.
Set the pressure first, then fine-tune with the depth dial.
How do you match pressure to trim and material?
Softer wood needs less pressure, and harder wood or longer nails need more. Match the setting to the job instead of leaving the regulator in one spot.
- Soft pine baseboard: about 75 to 85 PSI, so the head doesn't crater the surface.
- Hardwood casing: about 90 to 100 PSI for a clean set.
- Thin plywood or paneling: keep it low and use a no-mar tip to avoid dents.
- 2 in brads in dense stock: near the top of the range, testing as you go.
Longer nails need more air to drive fully. Short 5/8 in brads in soft wood need much less.
When in doubt, test on an offcut, not on the finished face.
If you're still deciding which gun to run, our guide to what a brad nailer is used for covers the jobs it handles around the house. Loading is the other half of a clean setup, and our walkthrough on how to load a brad nailer keeps the magazine feeding right.
Three brad nailers and their working ranges
The pressure you set depends partly on the gun. These three 18-gauge models are common choices for trim work.
Check the manual or label for each gun's exact working pressure, then start low and test. Every model in this group runs on compressed air and a standard 1/4 in fitting.
How do the three guns differ in how they handle depth and airflow?
The DeWALT runs 18-gauge brads from 5/8 in. to 2 in. and gives you a tool-free depth-of-drive adjustment with detents, so you can lock in the setting that matches your test nail. Its rear exhaust points air away from the work surface.
It also has a removable non-marring nose tip with on-tool storage and an adjustable belt hook. It ships as a kit with a carrying case, a 1/4 in fitting and the owner's manual, and it uses a sequential-style trigger.
The Metabo HPT takes the same 5/8 in. to 2 in. brads and lists 2.2 lb as its weight. Its depth-of-drive dial works without tools, and a reload indicator warns you when the magazine is running low so you avoid blank drives.
The 360 degree adjustable exhaust keeps dust, debris and oil off the finish. It adds a selective actuation switch for bump fire or sequential fire, an easy-to-clear nose for jam removal, safety glasses, no-mar tip, hex bar wrenches and a carrying case.
The warranty runs 5 years.
The Bostitch has the widest nail window of the three at 5/8 in. to 2-1/8 in. Its Smart Point nose is smaller than older Bostitch designs and needs no contact trip compression to actuate.
The Dial-A-Depth control handles countersinking, and the selectable trigger switches between sequential and contact operation. It runs oil-free to cut the risk of oil stains.
The kit includes a 1/4 in air fitting, carrying case and extra no-mar tips, and the warranty runs 7 years limited.
Can you run a brad nailer on a small compressor?
Yes, a small pancake compressor usually handles an 18-gauge brad nailer. Brad nailers use little air per shot compared with framing guns.
Look for a compressor with a regulated output and a tank of at least a couple of gallons. That gives you enough reserve for a run of trim without waiting between nails.
If you plan to fire hundreds of nails in one session, a larger tank keeps the pressure steadier. A small tank works fine for short jobs and single boards.
If you'd rather skip the compressor and hose entirely, a brad nailer without compressor runs on a battery. That's a good fit for small repairs where dragging out air gear is more hassle than the job.
How do you fix common pressure problems?
Most pressure problems come down to the regulator, the hose or the tank. Check those in order before blaming the tool.
- Heads proud of the surface: raise pressure in 5 PSI steps and check the depth dial.
- Heads overdriven: lower the regulator and back off the depth adjustment.
- Weak drive after several nails: let the tank refill or switch to a larger tank.
- Misfires and jams: drain water from the tank, check the fitting and clear the nose.
- Air leaking at the tool: check the fitting and the magazine seal.
If the gun still misfires at the correct pressure with a full tank, the problem is likely the nail strip or a jam, not the air supply. Clear the nose and reload before adjusting anything else.
What pressure should you use for the first test nail?
Start at 80 PSI and adjust from there. That's the short version of how much air pressure for brad nailer work you need to remember.
Test on a scrap of the same trim, set the depth dial, then fire the real board. Keep the regulator inside the 70 to 120 PSI range and the gun will set heads cleanly without splitting thin stock.
Once the test nail looks right, the pressure is right.
If you're shopping for a gun to run at these settings, our roundup of the best brad nailers for trim compares the models worth a closer look.
Frequently asked questions
What happens if the air pressure is too low?
Low pressure leaves nail heads sticking above the surface and can cause the tool to misfire or skip nails. Raise the regulator in small steps, but stay within the range the maker lists.
Can too much air pressure damage the wood?
Yes. High pressure drives heads too deep, dents soft trim and splits thin stock near the edges.
It also adds wear to the nailer.
Turn the regulator down rather than forcing deep drives.
Should I use a bigger compressor for a brad nailer?
A small pancake compressor is usually enough for an 18-gauge brad nailer. What matters more is a steady regulated output and a clean, dry air supply.
A larger tank helps when you fire many nails quickly.
Does hose length affect the pressure at the nailer?
Yes. A long or narrow hose drops pressure at the tool.
Set the regulator with the hose connected and the gun attached, or use a gauge at the tool end to confirm the real working pressure.