Can I Use a Brad Nailer for Trim?
Yes, you can use a brad nailer for trim, as long as the trim is light and the brads are long enough to reach the wood behind it. An 18-gauge brad nailer suits baseboard caps, window casing, door trim and small crown molding.
On this page (9 sections)
- What trim can you fasten with a brad nailer?
- How long should the brads be for trim?
- Can a brad nailer handle baseboards and crown molding?
- Do you need glue with brad nails?
- How do you set up a brad nailer for trim work?
- Which brad nailer suits trim work?
- What mistakes split trim or leave nails proud?
- When should you use a finish nailer instead?
- So, can you use a brad nailer for trim?
Yes, you can use a brad nailer for trim, as long as the trim is light and the brads are long enough to reach the wood behind it. An 18-gauge brad nailer suits baseboard caps, window casing, door trim and small crown molding.
It is the wrong tool for thick baseboard or heavy crown. Those boards need a larger fastener with more holding power.
The trick is knowing where a brad nailer fits and where it does not.
What trim can you fasten with a brad nailer?
Light trim up to about 1/2 inch thick is the sweet spot for an 18-gauge brad nailer. That covers window and door casing, baseboard caps and shoe molding.
Small crown molding in the 2 to 3 inch range also works when the pieces are short and you support them while nailing. The brad holds the molding in place while glue does the real work.
Thin decorative trim is another good fit. Picture frame molding, chair rail and panel trim all sit in brad nailer territory because the boards are narrow and light.
The limit is thickness and weight. A brad is a thin 18-gauge wire nail, so it bends under load and grips less than a 15- or 16-gauge finish nail.
When the trim is wide, tall or likely to get bumped, move up to a finish nailer. Our guide to what gauge nailer for trim breaks down each size.
How long should the brads be for trim?
Choose brads long enough to pass through the trim and bite about 3/4 inch into the wood behind it. That extra bite is what actually holds the piece.
For common 1/2 inch casing, 1-1/4 to 1-1/2 inch brads usually work. For 3/4 inch trim, step up to 1-1/2 or 2 inch brads.
Measure the trim thickness plus the depth you want in the wall before you load the magazine.
The nailer's rated range matters too. The WEN 20512 shoots 18-gauge brads from 3/4 to 2 inches long, while the DeWalt DWFP12231 handles 5/8 inch to 2 inch brads.
Anything outside that range will jam or fail to drive.
Don't overdo length. A brad that pokes through the back of a thin casing leaves a sharp tip in a closet or cabinet interior.
When in doubt, go one size shorter and add glue.
Can a brad nailer handle baseboards and crown molding?
A brad nailer works on baseboard caps and shoe molding, not on full baseboard. Standard baseboard is thick and takes hits from vacuums and furniture, so it needs a 15- or 16-gauge finish nailer.
Crown molding follows the same logic. Small profiles up to about 3 inches can go up with brads and glue, provided someone holds the piece while you nail.
Larger crown, especially on long walls, needs the bigger fastener and often a second pair of hands.
Use the brad nailer where trim is decorative and light. Reach for a finish nailer where the board is structural, wide or likely to be knocked.
That split keeps joints tight and avoids callbacks.
Do you need glue with brad nails?
Yes, glue does most of the holding and the brads only clamp the joint while it sets. A brad alone loosens as wood expands and shrinks through the seasons.
Run a thin bead of wood glue along the back of the trim and press it into place. Fire brads every 8 to 12 inches and near the ends to hold the piece tight while the glue cures.
Wipe away squeeze-out right away with a damp cloth. Glue that dries on finished trim is harder to remove without marking the surface.
The brads also stop the trim from sliding while the glue grabs. Together they handle the seasonal movement that would pull a nailed-only joint apart.
That combo is the standard approach for interior trim work.
How do you set up a brad nailer for trim work?
Match the brad length to the trim, set the depth, and test on a scrap piece first. A few minutes of setup prevents split boards and overdriven heads.
Load the magazine with the correct 18-gauge brads and check the tool's range. The DeWalt kit drives 18-gauge brads from 5/8 inch to 2 inches and includes a tool-free depth adjustment with detents.
The Ryobi P321 is an 18V cordless unit that runs without a hose or compressor.
Set the depth so the head sits just below the surface. Fire one brad into a scrap of the same trim and check how far it sinks.
Adjust and repeat until the head is barely visible.
Check the nose tip too. The DeWalt kit has a removable non-marring nose tip, which helps on finished surfaces.
For the full sequence on long runs, see how to use a finish nailer for baseboards and trim.
Which brad nailer suits trim work?
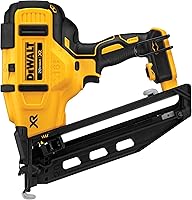
The DeWalt DWFP12231 is the best pick here for most trim jobs. It drives 18-gauge brads from 5/8 inch to 2 inches and has a tool-free depth adjustment with detents for setting nail heads.
Its maintenance-free motor is built to avoid staining the work surface, and the rear exhaust keeps air and debris away from the trim. A tool-free jam release makes clearing a stuck brad quick.
The kit comes with a carrying case and a 1/4 inch fitting.
The Ryobi P321 is the pick for anyone already in the ONE+ battery system. It runs on 18V and skips the compressor and hose.
The tool is sold alone, so battery and charger are separate.
The WEN 20512 suits buyers who want a cordless kit with the battery included. It fires 3/4 to 2 inch brads from a 100-nail magazine and includes 400 brads plus a 2.0Ah battery and charger.
Its LED indicator tracks battery status, magazine fill and tool temperature.
What mistakes split trim or leave nails proud?
Overdriving the nail and nailing too close to the end are the two common causes. Both are easy to avoid with a scrap test and a bit of care.
Set the depth so the head sits just below the surface, not deep into the wood. An overdriven brad leaves a crater that needs filler.
An underdriven one leaves a head you have to set by hand.
Place nails 1 to 2 inches in from each end of a board and angle them slightly inward. Nailing straight into the end grain of narrow trim is the fastest way to split it.
Space the rest every 8 to 12 inches.
Keep your free hand clear of the firing line and wear safety glasses. A brad can deflect off a knot or hidden fastener.
For tool choices to match the job, our brad nailer roundup compares the options.
When should you use a finish nailer instead?
Switch to a 15- or 16-gauge finish nailer when the trim is thick, wide or gets bumped. Baseboards, door and window casings in heavy profiles and large crown all fall into that group.
A finish nail is thicker and longer, so it holds better in dense wood and wide boards. It also resists the sideways force that loosens brads over time.
Brads still make sense for the light layers on top: baseboard caps, shoe molding and small casing. Many trim jobs use both tools, running the finish nailer on the main boards and the brad nailer on the trim pieces.
If you only buy one tool and your job is mostly casing and light molding, a brad nailer covers it. If baseboard or crown dominates, put the budget toward a finish nailer first.
So, can you use a brad nailer for trim?
Yes, a brad nailer is a good fit for light trim, provided you size the brads to the board and glue the joints. It handles casing, baseboard caps, shoe molding and small crown well.
Choose the DeWalt DWFP12231 for a pneumatic kit with depth control and a jam release. Pick the Ryobi P321 if you already run ONE+ batteries.
Take the WEN 20512 if you want a cordless kit with the battery and brads in the box.
For heavy baseboard and large crown, step up to a finish nailer. When you're ready to buy, the brad nailer picks guide covers the trade-offs in more detail.
Start with a scrap test, keep glue on the joint, and the brads will hold your trim tight.
Frequently asked questions
Can I use a brad nailer for baseboards?
Only for light baseboard and baseboard caps. A brad nailer drives 18-gauge nails that bend easily and grip weakly in thick baseboard, so use a 15- or 16-gauge finish nailer for full-height baseboard and save the brad nailer for shoe molding and quarter round.
What length brads do I need for trim?
Pick a brad long enough to pass through the trim and bite about 3/4 inch into the wood behind it. Most 1/2-inch trim takes 1-1/4 to 1-1/2 inch brads, while 3/4-inch trim usually needs 1-1/2 to 2 inch brads.
Will a brad nailer split trim?
It can, especially near the ends of narrow boards or in hard wood. Place nails about 1 to 2 inches in from each end, angle them slightly inward, and turn down the driving depth so the head sits just below the surface.
Can I use a brad nailer for crown molding?
Yes for small crown profiles, such as 2 to 3 inch crown. Larger crown needs the holding power of a finish nailer, and long runs are easier with two people supporting the molding while the brads go in.
Do I need glue as well as brads for trim?
Yes. A bead of wood glue along the joint gives the trim most of its holding power, and the brads hold the piece while the glue sets.
Brads alone loosen over time in wood that expands and shrinks with the seasons.