How to Use a Framing Nailer on Decks, Fences and Sheds
Use a framing nailer by matching the nails to the tool and project, wearing eye protection, holding the nose firmly against the work, and firing only when the board is supported. Test the depth on scrap wood first, then check each connection.
On this page (8 sections)
Use a framing nailer by matching the fasteners to the tool and project, wearing eye protection, and keeping the nose firmly against supported lumber before firing. Set the depth on scrap wood first, then check that each nail holds the joint without splitting the board.
Framing nailers are for joining larger pieces of wood, such as framing, deck structures, shed walls, and fence rails. Start with the tool manual and the project plans, because nail angle, length, and connection requirements vary.
How do you use a framing nailer safely?
Wear eye protection, keep your hands clear of the nose, and disconnect the power source before loading or clearing a jam. Read the manual for the exact safety steps and firing mode for your model.
Keep the tool pointed away from yourself and others. Don't carry it with a finger on the trigger, and don't fire toward a loose, unsupported board.
A framing nailer can drive a fastener through lumber with enough force to cause serious injury. If a nail misfires, jams, or bends, stop and follow the manual's clearing instructions rather than reaching into the tool.
For more detail, see these nail gun safety tips. If you're still comparing tool types, the plain guide to types of nail guns explains where framing nailers fit.
What nails should you load?
Load only nails that match the nailer's angle, collation, head style, diameter, and length range. Then confirm the nail itself is suitable for the wood and joint in your plans.
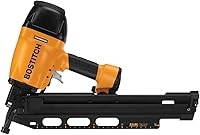
A framing nailer may take clipped-head or full-round-head nails, depending on its design. The magazine angle also matters: a 21-degree nailer needs the matching 21-degree plastic-collated fasteners.
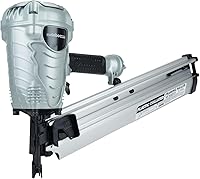
For example, the Metabo HPT NR90AES1 accepts 2 in to 3½ in plastic-collated framing nails. The NuMax SFR2190 is designed for 21-degree plastic-collated full-round-head nails from 2 in to 3½ in.
Don't choose a nail just because it fits the magazine. Check the plans and local requirements for the right length and material, especially for outdoor structures exposed to moisture.
The framing nailer guide covers common tool types and their uses. For a fence-specific choice, see what size nail gun you need for fencing.
How do you set nail depth?
Test the depth on scrap lumber that matches the work before driving nails into the project. Adjust the depth control until the nail head sits as intended without crushing the surface or protruding.
A nail driven too shallow can catch on clothing or leave a weak connection. One driven too deep can damage the wood or reduce the hold, especially near an edge.
Make a few test shots, then check both sides of the joint if you can. The right setting can change with wood density, thickness, and the nailer's air pressure or battery charge.
The NuMax SFR2190 has a tool-free depth adjustment wheel. The Metabo HPT NR90AES1 also has tool-less depth adjustment for flush or countersunk driving.
Don't assume one setting will work across a whole deck, fence, or shed. Recheck on offcuts when you change lumber or move to a different part of the structure.
How do you position the nailer on a deck?
Keep the nailer square to the supported framing member and drive only where the deck plan calls for structural fasteners. Confirm that boards are aligned and held in place before firing.
For a deck, the framing nailer is typically used for structural connections, not for every visible surface board. Use the fastener type specified for joists, beams, posts, and blocking; follow the plans and local code.
Avoid firing close to board ends unless the plan calls for it and you can keep the fastener clear of edges. A nail too near an edge can split the lumber or miss the supporting member.
The Metabo HPT NR90AES1 is described for flooring and framing, truss build-up, subflooring, roof decking, wall sheathing, and housing construction. That range makes it a candidate for framing tasks when its nail type and length match your plans.
Keep body weight balanced and the work stable. If you need to reach awkwardly or hold a board with one hand near the firing area, reposition the work or get help supporting it.
How do you use a framing nailer for a fence?
Position the nailer square to the rail and drive into the post or rail connection specified by your fence plan. Keep the picket and framing supported so the nail doesn't glance off or split the wood.
Use the correct outdoor fasteners for the lumber and conditions. Check the fastener maker's guidance and project requirements for corrosion resistance; an indoor nail may not hold up outdoors.
The NuMax SFR2190 is designed for wood fencing as well as framing, subfloors, and roof decking. Its no-mar safety tip is intended to help protect work surfaces, but keep the tool aligned and avoid pressing hard enough to dent a board.
For more on tool fit and nail size, use the guide to choosing a nail gun for fencing. If you're building a shed instead, the same square positioning and supported-work habits apply to wall framing.
How do you frame a shed with a nailer?
Follow the shed plans for stud spacing and connections, then nail each joint while the lumber is aligned and braced. A framing nailer can speed repeated framing work, but it doesn't replace layout checks.
Mark stud positions before assembly and confirm the frame is square. Tack the parts together only when they are properly aligned, then complete the specified nailing pattern.
Some framing nailers offer sequential and contact firing modes. The Metabo HPT NR90AES1 switches between them with a selector, while the NuMax SFR2190 has a dual-mode trigger.
Use sequential firing when you want more deliberate placement; use contact firing only if the manual allows it and you can control the tool.
The Craftsman V20 CMCN621PL is cordless and drives nails up to 3¼ in, according to its product description. Its battery and charger are sold separately, so account for those when deciding whether it fits your work setup.
Choose an air-powered model if you already have a compatible compressor and hose setup. The best 21-degree framing nailers guide compares options in that angle class.
What should you check after each shot?
Check that the nail entered the intended framing member and that the joint remains tight and aligned. Stop if the fastener bends, splits the wood, or misses the target.
A quick visual check can catch a nail that stands proud or lands at an angle. Don't cover a questionable connection with sheathing or trim until you know whether it meets the plan.
Keep track of nails near edges, corners, and knots, where wood can split more easily. If a board cracks, replace or repair it according to the project requirements rather than adding random nails nearby.
If the nailer jams or stops feeding correctly, disconnect it as directed and follow the manual. The guide to clearing a jammed nail gun safely walks through the general process.
Which framing nailer setup fits your project?
For learning how to use a framing nailer, match the tool to your fasteners, power source, and project plans first. Use an air model if you have the compressor setup, or consider a cordless model when working without hoses is useful.
The Metabo HPT NR90AES1 takes 2 in to 3½ in plastic-collated nails and has a selectable firing mode. The NuMax SFR2190 covers wood fencing among its stated applications, while the Craftsman V20 CMCN621PL runs on the V20 battery platform and takes nails up to 3¼ in.
Choose based on the connections you need to make, not speed alone. For finish work such as baseboards and trim, a framing nailer is usually too large; see how to use a finish nailer instead.
Frequently asked questions
Can you use a framing nailer for a deck?
A framing nailer can drive framing nails for structural deck work when its angle, collation, and nail size match the tool and the project plans. Use fasteners approved for the lumber and connection, and follow local code and the nailer's manual.
It isn't a substitute for a decking nailer or screws where those are specified.
What size nails do I use in a framing nailer?
Use only nails that match the nailer's angle, collation, head style, diameter, and length range. Then choose a length that suits the material thickness and connection requirements.
Check the manual and project plans before loading; nails that fit the magazine can still be wrong for the job.
Should I use bump fire or sequential fire?
Sequential firing is the better choice when you need deliberate placement, since each nail requires a separate trigger action. Bump firing can be faster, but it raises the chance of an accidental shot if the nose contacts the work while the trigger is held.
Use the mode your manual recommends.
Can a framing nailer be used for fence boards?
A framing nailer can be used for fence construction when the fastener is suited to the wood and the connection. A 21-degree model such as the NuMax SFR2190 is described for wood fencing.
Check nail length and corrosion suitability for your fence, and keep the tool square to the rail.